Welcome to the Home of the RC Army

The Rockin' Cocks started as a three man pump team at a local Charlottesville paintball tournament in 2006. Since then the Rockin' Cocks have expanded to a full roster and network of teams across the world. The RC Army represents that family of pump players made up of the Rockin' Cocks, The RC Revolution (Northern VA), RC Red Star (Australia) and RC Sweden.

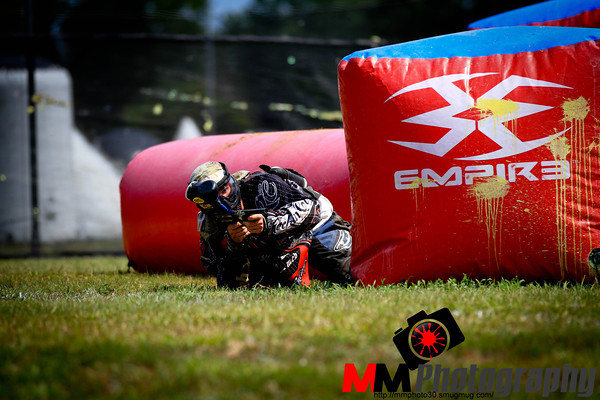
We play all kinds of paintball but what we love is playing tournaments with pumps. We don't care what the other team is shooting as long as we've got our pumps...we are having a good time.

Check out or rosters, videos, pics and propaganda. If you like what you see...or even if you don't...leave a comment and let us know what you think.

Showing posts with label ccm. Show all posts

Wednesday, August 3, 2011

Rockin' Cocks @ the CFOA


Last weekend both Rockin’ Cocks and RC Revolution competed in the CFOA Battle at the Beach.
This event is possibly the last event of the season for the CFOA Pump Division and had 7 teams competing for the final 1st place medal of the year. Here is how it went…

The teams all started to head down Thursday for the event and about two months prior the teams had
been chosen. Initially the plan was to enter three teams for this event, however all said and done only two teams made the trip, Rockin’ Cocks and RC Revolution. Rockin’ Cocks consisted of Amish, CMCD, and I all of which had been practicing together well before deciding to enter this event. RC Revolution consisted of Scott, Dana aka The Shark and Bob. The Revolution team hadn't practiced together too much before the event due to work or illness.

However none of this mattered because when we arrived at the field the morning of the tourney it was a cool 89 degrees and by the time play started it was 113 degrees.

The day started off early, both teams arrived at the field around 9:30am despite not having to take the
field till around 12:30am. Even though we had the layout in advance, we still wanted to walk the field and check the lanes. The field layout was somewhat aggressive, with a dominant snake and a d-side that seemed to make or break games. Most teams chose to send two players on the snake side and one on the d-side, however a few teams differed here and there.

The first game for either RC team was RC versus Custom Pump Creations and true to tradition RC lost the
first game and that tradition also seemed to follow RC Rev. However after that first loss, RC had gone 3-1 and RC Rev was holding their own and then it happened… RC versus RC Rev. RC switched the break-out for the 3rd time this event with Amish going out to D1, CMCD staying back center, and me going to the snake corner. RC Rev broke-out with Dana going to the snake side Tall Mayan, Scott staying back center and Bob going to the D-side. The first K came when Dana got shot by either CMCD or I. After that I was able to fill the snake and Amish got a quick shot on Scott who was in the bunker next to him crossed up on me. At this point the feeding frenzy was on, however Bob shot Amish and continued down the d-side. Which lead to a battle between him and CMCD, confident CMCD would win, I jumped out of the snake and grabbed the flag, about this point I heard CMCD call out and I realized Bob was now somewhere around D3 or D4 on our side of the field and I was on their side of the field. Rather than chance losing a gun battle, I ran with whatever energy I had left and dove into the flag station hanging the flag for the win. After that game each team had one game left and won both. Now the wait to hear who was moving on to the semi-finals, when the announcement came it was Custom Pump Creations in 1st(7-0), RC in 2nd (6-1), RC Rev in third (5-2) and DNS in 4th (5-2). Now normal thinking would have figured it would be CNP vs. DNS and RC vs. RC
Rev, however the semi’s where CNP vs. RC Rev and RC vs. DNS.

I honestly don’t remember much of the semi’s except we won and RC Rev didn’t, which faced CNP vs. RC
for and 2nd and RC Rev vs. DNS for 3rd and 4th. The first match of the finals was RC Rev and DNS which went to time. The next match was CNP vs. RC and that two went to time. The second match was RC vs. CNP and that game ended with an RC win. The winning moment came when I shot the back center in the face as he tried to fill the 40 center small dorito, rather than going out he stayed in and got a 1 for 1. After this with the help of CMCD, I ran down the snake player and RC had the first win of the finals. The next game was RC Rev vs. DNS and this was a close game. It came down to Scott and Dana in a 2 on 1 versus 1 DNS player. Scott on their side of the field and Dana in the snake, Scott told Dana to grab the flag and pull a Chrispy (me) but Dana didn’t hear him and within a few second both had been shot, however DNS could not hang the flag prior to the time running out. The last game of the finals was tense, all we had to do was draw the game and we won. Both teams had clean break-outs and the game began to stalemate, however one of the CNP guys shot Amish on the d-side and then proceeded to fill our D1. All pinched in CMCD and I tried to fend of the fill and luckily CMCD shot the guy in his stick feed. But in the process got shot by the snake guy, this now left me in a 2 on 1. Luckily I had just reloaded and both players where on the snake side of the field and about 15 intense seconds later time was called and the game was over. RC had just won their first tournament ever. RC Rev and DNS played one last final game which again came down to time and RC Rev finishing in third due to DNS being able to pull the flag in game 2.

Overall it was a great event, and I probably didn’t realize it until the next morning when we were chilling
on the porch at 10am reminiscing about what we had just accomplished. Additionally I want to give a big thanks to the CFOA peeps, the folks at Adventure Beach Paintball, all the teams that showed up and grinded it out despite the heat, my teammates, our sponsors Exalt, St!ffi, The Lifestyle Clothing and our supporters MCB and CCM. We also want to give a special thanks to Dan and his parents for letting us use their beach house.

Additionally please stay tuned for the epic tale of Bob and Chris go to Cook Out…A seven hour tale of two
dudes epic quest for quality southern fast food.

-Chrispy

Amish

Champions - Chrispy, CMcD, Amish

Bob

Dana

CMcD


Chrispy

Amish & CMcD Off the Break

Sunday, April 3, 2011

A Quick Reminder...

...this is what we do.  

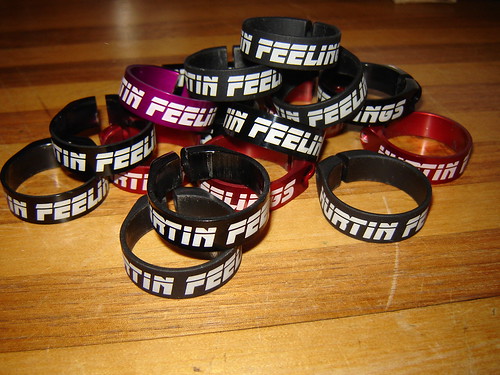
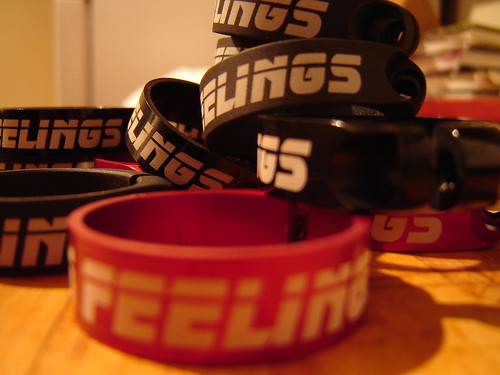
We got these sweet custom feedneck clamps done up by Mel and Rod at CCM.  The font is the same as you will find on the T2 but looks great with any CCM marker!  


Thursday, March 31, 2011

2003 CCM J2 Walkthrough: Part II


I figured before I made any more progress on assembling and timing the marker I would give a quick rundown of what I've got.

Here it is...a 2003 CCM J2 Autococker. The anno is dust grey and the marker has a little bit of anno wear but not very much. One thing that I am actually kind of excited about on this gun is the barrel. Of course the factory anno is a perfect match but the milling and porting is also very cool. It also happens to be a 14" barrel...which I like much better than the current 12" barrels.

The Pneumatics

I've got a CCM 3-way, CCM Ram and Dye Rocket LPR. The air first comes into the LPR, is regulated down and flows into the 3-way. The 3-way is the little silver guy and he basically manages the airflow as you pull the trigger. The ram is what cocks the marker and loads a ball into the breech. Air enters the ram, forcing the cocking rod back, (this is where you do the work if you have a pump handle on it) moving the bolt back, allowing a ball to fall into the breech while simultaneously cocking the hammer. So, when the marker is at rest, you've got a loaded ball and a hammer latched in with a spring behind it, waiting to get released so a blast of air can then propel the ball. Alright...that's enough autococker 101...I really just wanted to show you what was on the front block.

Everything else is pretty standard. Stock super tall feedneck. The stock feedneck clamp did come with the gun but unfortunately it's in two pieces. The surprising part is that it still does its job...how's that for reliability? The back block, front block, frame, bolt, internals, beavertail, frame and reg are all genuine CCM. It didn't come with a rail or ASA but I've got a few kicking around so that wasn't a big deal. The only hassle that I've had to deal with is the placement of the reg in relation to the frame. You either have to remove the grip frame or the air fitting on the reg to get the reg off of the body. Not a big deal but a bit of a pain when you've taken the gun apart then put the frame back on realizing that you forgot to put the reg on.

This particular J2 (as is the case with most of them) was drilled for eyes from the factory. This allows you to get an aftermarket electronic grip frame that can tell when there's a ball in the breech. It's is a coveted thing among 'cocker fans to have an undrilled body...I don't think it's so bad. What's important to me is that it was done in the factory, so the anno is intact and it's done well.

So that's the breakdown. Next post will have assembled pics of the marker and hopefully an accounting of how easy it was to get it timed.  I am currently waiting for a fitting for the LPR.  The one that came with it threads too far into the body of the LPR and gets in the way of the reg piston.


Monday, March 28, 2011

2003 CCM J2 Walk-Through: Part I

95% of the paint that I've shot has been out of a pump and the majority of that paint has been shot out of a sniper-based pump...specifically one of the CCM's I've owned over the past few years.

I am a pretty handy guy and I know my way around snipers pretty well. I'm no expert but I can break one down, clean it up, get it back together, get it shooting to the appropriate velocity and time the autotrigger (if needed).


That being said, I've never fiddled with an Autococker, so I figured I would pick one up and see what it was all about. I've been spoiled by CCM guns so I figured this 2003 CCM J2 would be a good place to start.

I picked this up on Ebay and immediately aired it up. It was apparent right away that it needed some work. It fired but not reliably and it had some leaks. I didn't know exactly what I was getting into so I started with three things.

  • Tightening/Replacing Screws
  • A Little Autococker Timing Research
  • A Quick Call to CCM

Tightening, Replacing & Cleaning

From working with pumps I know that it's important for everything to line up the way it's intended. If the frame or cocking rod are loose, that will mess with your timing. The rear frame screw on the J2 was a little long which created a gap in the frame, so I replaced that with the appropriate length screw. Then I made sure the cocking rod was snug.

At this point I tried cocking the marker. It didn't quite work so I adjusted the hammer lug and loosened the lower travel screw on the trigger so I could get full travel on the trigger and the sear would clear the hammer lug. (If this doesn't make sense, hold tight, I'll go into a little more detail later). This pretty much ended my carry over knowledge from working on pumps.

Autococker Timing Research

I poked around online and found a couple of good resources for autococker timing. The video below is a reasonable (non-annoying) introduction to timing an autococker. It doesn't go into any of the details of maintaining or servicing the pneumatics, but it does give a good feel for what each of the parts do and how they work together. I also found this article to be a good reference. The most confusing part of working with an autococker (in my opinion) is the terminology. There are a lot of parts required to accurately and consistently get a marker to automatically fire and recock (e.g. Ram, Hammer, Hammer Lug, IVG, Back Block, Front Block, LPR, Ram, 3-Way, HPR, Cocking Rod, Breech, Bolt, Trigger, etc)


Using the two references above, I was able to get the J2 to shoot and recock pretty reliably. It still had some small leaks but it was a good first step. I figured my next step was to phone a friend.

My Call To CCM

I called CCM to speak to Rod earlier this week just to get an idea of what I was working with. Since I had watched the video, read the article above and had some experience with snipers I was able to follow along with Rod's descriptions pretty well. It's always fun to chat with Mel and Rod. I did have a couple of specific questions for him about this marker.
What's the operating pressure of the regulator?

Rod told me that these were designed to run around the same pressure as their current guns, right around 350 psi. All of the current CCM pumps also operate very well in the 300-350 psi range, so that's a good starting point for any CCM marker. Other autocockers may operate at a different pressure so do some research to find out where you should set your reg if it's not a CCM gun.

What is the advantage of having an adjustable LPR?

My understanding is that the LPR let's you determine how hard the bolt is going to hit the ball. With a stock CCM setup, they wanted to bolt to bounce off of a ball if it got stuck in the breech so they designed it to work at pretty low pressure (around 35 psi). Other guns may run at a higher pressure.

What should I do to clean this thing up?

Rod suggested that the LPR may be loctited into the body since that's the only component that actually has air running from the gun into it. He suggested that I just take the parts off of the front block, clean them up and relube. Because of the design of the 2003 J2's ASA, you have to remove the timing rod from the 3-way so your timing will have to be readjusted once you are done putting it back together. One thing I noticed is that pneumatics have some very small o-rings. Much smaller than anything in my kit for my CCM pumps.
So Where Am I Now?

I've got the gun all cleaned up and put back together. The cleanup actually went pretty well. A quick q-tip through the 3-way and a little lube here and there and it was in good shape. I adjusted the 3-way, and with a little trial and error, I got the timing is close but I do have to figure out a couple of leaks. I need to replace all of the hoses on the pneumatics and replace a couple of o-rings on the LPR and I should then be able to dial in the timing. Since I don't have any of the hoses or o-rings I need, I'll have to get to a paintball store to pick those up.

From there the next step is to put some paint through it and see what it chrono's at. Before that, I may go through a run down of the parts on the gun as it sits now.

Thursday, July 8, 2010

All Available CCM Options

Here are all of the currently available options from Chipley Custom Machine aka CCM. There may be a wait for certain things based on available machine time (e.g. Carbon pump handles) but I am pretty sure everything here is still in the current lineup.

Markers
  • S6

  • J2L

  • T2

  • S6.5

Grip Frame Options
S6, J2L, S6.5, T2
  • 86

  • 45

  • Thin 45
Pump Handle Options

S6, J2L, S6.5
  • standard (Carbon, Aluminum or Delrin)

  • EZ-Grip

  • T Grip

T2
  • Standard Grip

  • T Grip

Feednecks
The standard feedneck is by far the most popular choice. It is approximately 1" long and there are close up pics of it in the images above. The Winchester feedneck looks similar to the standard feedneck except it is milled to accept smaller hopper feednecks. The 50 round Winchester hopper is notoriously small and requires a few wraps of electrical tape to hold in the standard feedneck. If you are too good for tape and love the Winchester, then the Winchester feedneck is for you. The no pro is a very short version of the standard feedneck. If you want the lowest profile possible, go with the No Pro.
  • Standard
  • Winchester
  • No Pro
T2 Breech Options
CCM has a limited run of left and right feed T2's available. Call them up and ask if you aren't a fan of center feed. The insert sizers were released in June 2010 and allow you to size your paint at the breech instead of the barrel.
  • Center Feed
  • Left Feed
  • Right Feed
  • Insert Sizers
Drop/Rail
You have the choice of the reverse drop or the micro rail. The default option is the micro rail which is pictured below on the right.
Barrels
  • 10" with one sizers (default)
  • 10" with full sizer kit
Colors* (Dust and Gloss)
- Gloss adds $75 to the base price of marker

  • Black
  • Silver
  • Gold
  • Green
  • Brown
  • Red
  • Blue
  • Purple
  • Pewter
  • Pink
* As of March 2010

Monday, July 5, 2010

CCM Sneak Peak


Recently I was allowed a sneak peak at CCM's newest idea. Bill sent me a message asking if I wanted to be a prototype tester, and I happily obliged. The product is an updated version of the Karni's ICS (internal cocking system). A very cool concept in and of itself. The need for a clunky cocking rod and backblock combo is replaced by a internal cocking rod. This resolves the need for both an external cocking rod and beavertail on a gun. Aesthetically it creates smoother lines, and makes for an overall better look to any gun.

The old ICS from a Karni was a pain to remove. CCM solved this problem by adding a set screw in the backblock to create easy-access to the internals. The great thing about this particular system, is it can be mounted on any autococker as an aftermarket part. The internals can be replaced with the ICS 'kit' and you're ready to rock in a matter of minutes. The internals themselves are almost identical to that of a stock autococker, save for the changes to the hammer and backblock that CCM made... I'll let the pictures do the talking.


Unfortunately my photography skills are somewhat sub-par, but... As you can see, there are some significant changes to the hammer and back-block. The cocking rod is now able to sink back into the hammer but is still attached to the back-block. This allows for flawless shooting (and auto-triggering) without the need for a external cocking rod. I've shot around 1000 rounds through it, and it's kept up with me. I first thought that the AT'ing function might be diminished due to this new system, but it works just like a regular cocking rod and back-block combo. CCM has put out another excellent product. I'm very pleased with the results of testing, and would recommend this product to anyone.

Monday, March 29, 2010

Spoon's take on the CCM T2


I started my pump career with a CCI phantom. It was a great introduction to pump play but once I discovered snipers, it was all over. I've had some pretty awesome snipers so far. It started with the Creamsicle S5, then a dust white S6, then a Camo S6 which was traded for my current T2.

I am kind of torn between my preferred T2 setup. On one hand I really like having the option of shooting a lot of paint very fast. My 48/4500 tank with a modified sportshot is perfect for those days. The sportshot always keeps balls in the stack no matter how fast I auto-trigger and the 48 ci tank let's me shoot as much as I want without having to worry about air.

On the other hand, I really like how light the T2 can be setup. With a 22 ci tank, I can still shoot a decent amount of paint but with half the weight of the 48ci tank. I pair that setup with a 50 rd winchester hopper and the setup doesn't slow me down at all. I have to be a little more careful with my shots and when playing against semi's it doesn't give me as much freedom to keep players in with a relatively steady stream...I have to be a little more conservative...but man is it light!

Anyway, those are basically the two ways I run my T2. After having it for a few months I've definitely noticed some things about it.

It's not particularly pretty. I just doesn't compare to the Creamsicle S5 or the Camo S6 but those were very limited run anno jobs and some of the most beautiful markers I've ever seen. Still, the T2 just isn't a "Sexy" gun. It's a bunch of tubes at right angles, that's it.

But it's the plain simplicity that makes the T2 light, a feature that I definitely appreciate. There's also the efficiency. Tests have been done and I don't know what the final verdict is, but whatever CCM did in this round of design makes for a very efficient gun. I haven't taken the time to do the tests but I am pretty sure you can get 400 shots off of a 22/3000 tank which should be plenty for most, especially if fills are readily available.

Another thing that I've noticed is that the T2 definitely requires regular attention. I wouldn't go so far as to call it fickle, but it's a finely tuned machine and things can go awry if you don't give the gun proper attention. The half-block design does allow for grime and paint to directly attack the bolt, something that one needs to be conscious of if playing in the woods where dirt and splatter abound or on the speedball field where getting peppered at 13 bps could end up with a nasty gun shot. I experienced first hand what happens when you get shell and paint in the lower tube...shot velocity drops significantly and there's really no on-field fix.

Some comparisons with the S6.

I find the pump stroke on an S6 (or J2L) to be just a little smoother than the T2. The T2 is almost "mechanical" perhaps due to the dual pump arms sliding through the guides on the body.
I think the full body sniper designs are a little more robust in general. The back block can't unthread itself, the lower internals are completely enclosed, etc.

The lack of backblock on the T2 however provides the option for a really tight setup if that's what you are looking for.

Overall, the T2 is an excellent machine and I can't say enough nice things about the people at CCM. They stand behind their product 100%. They play paintball and they know the in's and out's of their markers.

Friday, March 20, 2009

Another Hot CCM Product

In case you don't know, CCM makes some of the hottest pump guns on the planet.  The SS-25, S5 and S6 are in the hands of a lot of pump players and the upcoming J2L and Prototype are soon to follow.  Even those that don't have a full CCM marker know a little bit of CCM goodness goes a long way.  Their pump kits and frames are top notch. 

Not only does CCM make a great product but they've also got some of the best customer service.  They've helped me bring the Creamsicle Magic back into prime shape after picking it up on Ebay.  At the forefront of the service and tech support is Mel aka CCM Chick.  Well Mel has been working on a project of her own, a sick nasty Hello Kitty S6.  Enough jabber from me...check out the pics.